PythonでGmailの情報を取得する方法ってないの〜?!
PythonでGAS(Google App Script)を使いたい、そんな方に向けた記事です。
PythonでGmailの情報を取得するには、Gmail APIを使う必要があります。
前回(以下)の記事では、認証情報を取得する方法を解説しました。
今回は、PythonとGmailの連携方法(後編)として、
実際にスクリプトを書いて、PythonでGmailの情報を取得していきます。
- PythonでGmail APIを使う、スクリプトの作成
- セキュリティ認証の方法
- Gmail API の設定の流れ
環境
| OS | Mac 10.15.4 |
| Python | python 3.9 |
| 仮想環境 | Poetry |
| Homebrew | 8.0.19 Homebrew |
jsonスクリプトと、メソッドの作成
前回の記事で、Google API Platformからjsonファイルをダウンロードしました。
ここでは、jsonファイルのファイル名を credentials.json に変更します。
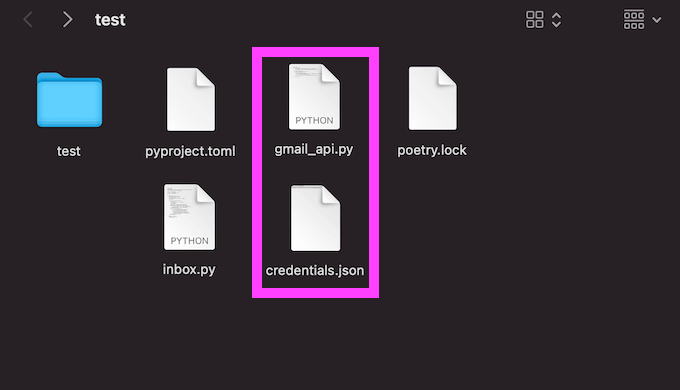
続いて、gmailメソッドを作成します。ファイル名は gmail_api.py にしています。
【追記】この記事を作成したときは必要だと思ったのですが、このスクリプト(gmail_api.py)は不要の可能性があります。
当時なぜこのメソッドが必要だと考えたのか失念してしまい、テストができていないため、念のため残しています。
class GmailAPI:
    def __init__(self):
        # If modifying these scopes, delete the file token.json.
        self._SCOPES = "https://www.googleapis.com/auth/gmail.readonly"

    def connect_gmail(self):
        store = file.Storage("token.json")
        creds = store.get()
        if not creds or creds.invalid:
            flow = client.flow_from_clientsecrets("credentials.json", self._SCOPES)
            creds = tools.run_flow(flow, store)
        service = build("gmail", "v1", http=creds.authorize(Http()))

        return service
flowの部分には、先のファイル名’credentials.json’ を引数に入れています。
パッケージのインストール
PythonでGmail APIを使うためのライブラリをインストールします。
Poetryを使っている場合は、以下は飛ばして、「Poetry環境でのモジュールを追加」を確認してください。
pip install --upgrade google-api-python-client google-auth-httplib2 google-auth-oauthlibpip install --upgrade oauth2client --ignore-installed sixPoetry環境でのモジュールを追加
Poetryを使っていない場合は、飛ばしてください。
Poetryを使っている場合は、以下でGmailのモジュールを追加します。
poetry add gmailUsing version ^0.6.3 for gmail
Updating dependencies
Resolving dependencies... (0.6s)
Writing lock file
Package operations: 1 install, 0 updates, 0 removals
- Installing gmail (0.6.3)続いて、oauth2clientを追加します。
poetry add oauth2clientUsing version ^4.1.3 for oauth2client
Updating dependencies
Resolving dependencies... (0.4s)
Writing lock file
Package operations: 7 installs, 0 updates, 0 removals
- Installing pyasn1 (0.4.8)
- Installing pyparsing (2.4.7)
- Installing httplib2 (0.19.1)
- Installing pyasn1-modules (0.2.8)
- Installing rsa (4.7.2)
- Installing six (1.15.0)
- Installing oauth2client (4.1.3)これでPoetryの環境が構築できました
Gmailのセキュリティ環境
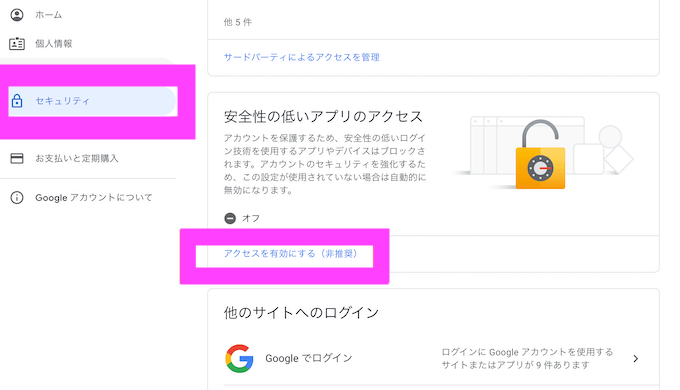
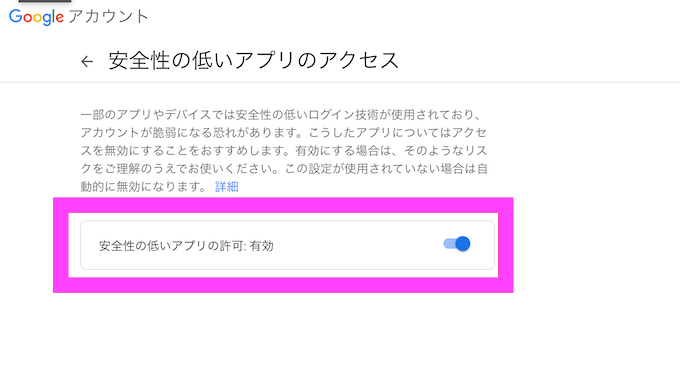
初めてGmail APIの処理をする際は、Googleのアカウントのセキュリティエラーが発生するため、以下の処理が必要になります。
まず、Googleのアカウントのセキュリティを選択し、「安全性の低いアプリ」のアクセスを有効にします。
Gmailの二段階認証の設定方法
もしもGmailの二段階認証を設定している方は、以下の記事を参照してください。
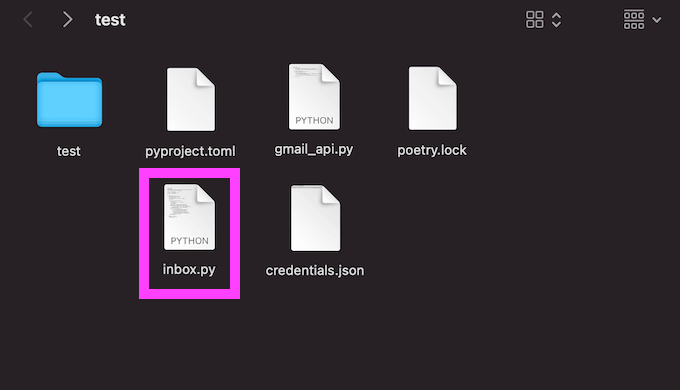
Pythonのスクリプトを作成
これからは、実際のPythonのスクリプトを作成していきます。
ファイル名は、inbox.py にしています。
Pythonスクリプトの内容
スクリプトの中身は以下です。
import imaplib
import email
from oauth2client.service_account import ServiceAccountCredentials
from email.message import EmailMessage

host = 'imap.gmail.com'
username = 'xxxxxxxxx@gmail.com'
password = 'xxxxxxxxxxxxx'


def get_inbox():
    mail = imaplib.IMAP4_SSL(host)
    mail.login(username, password)
    mail.select('inbox')
    _, search_data = mail.search(None, 'UNSEEN')
    my_message = []

    for num in search_data[0].split():
        email_data = {}
        _, data = mail.fetch(num, '(RFC822)')
        # print(data[0])
        _, b = data[0]
        email_message = email.message_from_bytes(b)
        #email_message = email.message_from_string(b)
        for header in ['subject', 'to', 'from','date']:
            print("{}:{}".format(header, email_message[header]))
            email_data[header] = email_message[header]
        # print(email_message)
        for part in email_message.walk():
            if part.get_content_type() == 'text/plain':
                body = part.get_payload(decode=True)
                email_data['body'] = body.decode()
            elif part.get_content_type() == 'text/html':
                html_body = part.get_payload(decode=True)
                email_data['html_body'] = html_body.decode()
        my_message.append(email_data)
    return my_message

if __name__ == '__main__':
    my_inbox = get_inbox()
    print(my_inbox)
スクリプトの補足説明
以下のセクションは、上記スクリプトについての補足です。
Gmailのログイン
host = 'imap.gmail.com'
username = 'xxxxxxxxx@gmail.com'
password = 'xxxxxxxxxxxxx'
password の変数には、ご自身のパスワード(Gmail)が入ります。
username の変数には、ご自身のメールアドレス(Gmai)を記入。
Gmail情報の選択
今回は、inboxの中から、未読のメールを取得できるよう ‘UNSEEN’を選択しました。
def get_inbox():
    mail = imaplib.IMAP4_SSL(host)
    mail.login(username, password)
    mail.select('inbox')
    _, search_data = mail.search(None, 'UNSEEN')
    my_message = []
もしもPythonを実行時に未読メールがない場合、情報が取得できないので、注意してください!
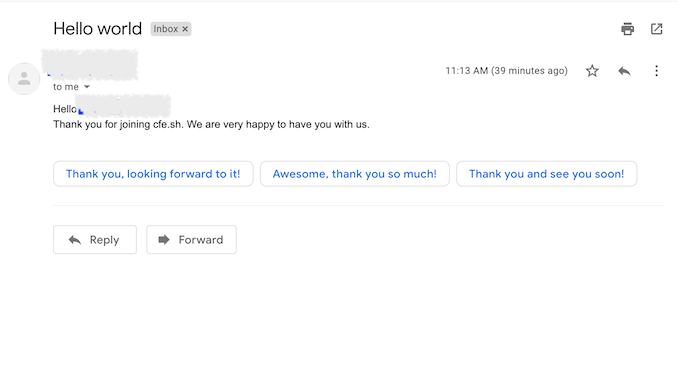
【Pythonの実行】メール情報の取得
今回は、こちらの未読メールを取得します。
ここではメールを開いていますが、未読メールに変更しています。
またこのメール以外のメールは既読にしています。
さきほど作成したPythonの実行をしたところ、以下が返ってきました。
subject:Hello world
to:xxxxxxxx@gmail.com
from:=xxxxxxxxxxxxxxxx= <xxxxxxxx@gmail.com>
date:Thu, 1 Apr 2021 11:30:59 +0900
[{'subject': 'Hello world', 'to': 'xxxxxxxx@gmail.com', 'from': '=xxxxxxxxxxxxxxxx= <xxxxxxxx@gmail.com>', 'date': 'Thu, 1 Apr 2021 11:30:59 +0900', 'body': 'Hello xxxxxxxx,\r\nThank you for joining cfe.sh. We are very happy to have you with us.\r\n', 'html_body': '<div dir="ltr">Hello xxxxxxxx,<br>Thank you for joining cfe.sh. We are very happy to have you with us.<br></div>\r\n'}]
クリワン
クリワンやった!Gmailの未読メールが、Pythonから取得できた!
問題なく、メールの内容を取得することができました。
まとめ
前編・後編、2つの記事で、PythonとGmailを連携するフローを解説しました。
僕自身、Gmailは業務になくてはもはやならないものなので、Pythonを使うことで、さまざまな業務効率化が考えれます。
設定自体は、多少手間はかかりますが、非常に便利な機能がつくれるはずなので、ぜひいろいろと試してみてください。
参考動画
今回、ご紹介したPythonスクリプトの内容は、以下の動画を参考にしています。
残念ながら英語しかないのですが、とても勉強になるので、英語に抵抗がない方は、ぜひこちらもチェックしてみてください。

コメント